Voiding a Claim
The process steps to voiding a claim depends on the current status of the claim:
The claim is unsubmitted:
Mark the claim as Submitted, to prevent it showing up and error at Unsubmitted Reports
Zero out the charge on the claim, to remove the dollars from financial reports
Void the claim
Enter a comment for reason of void
The claim was submitted but is not paid:
Wait for 835/EOB
Post the 835/EOB when received at claims
Mark the claim for resubmission
Void the claim, to allow for tracking the void
Enter a Comment of Reason for VoidZero out the charge on the claim
The claim was paid:
Post the 835/EOB
Adjust the claim to Zero balance
Mark the claim for resubmission
Wait for 835/EOB to return with accepted adjustment
Post the 835/EOB at claims
Void the claim
Following the Status of your claim, find the steps you need below. Note, they don’t follow the required order. Locate the status of your claim, and follow the steps.
Zero the Charge
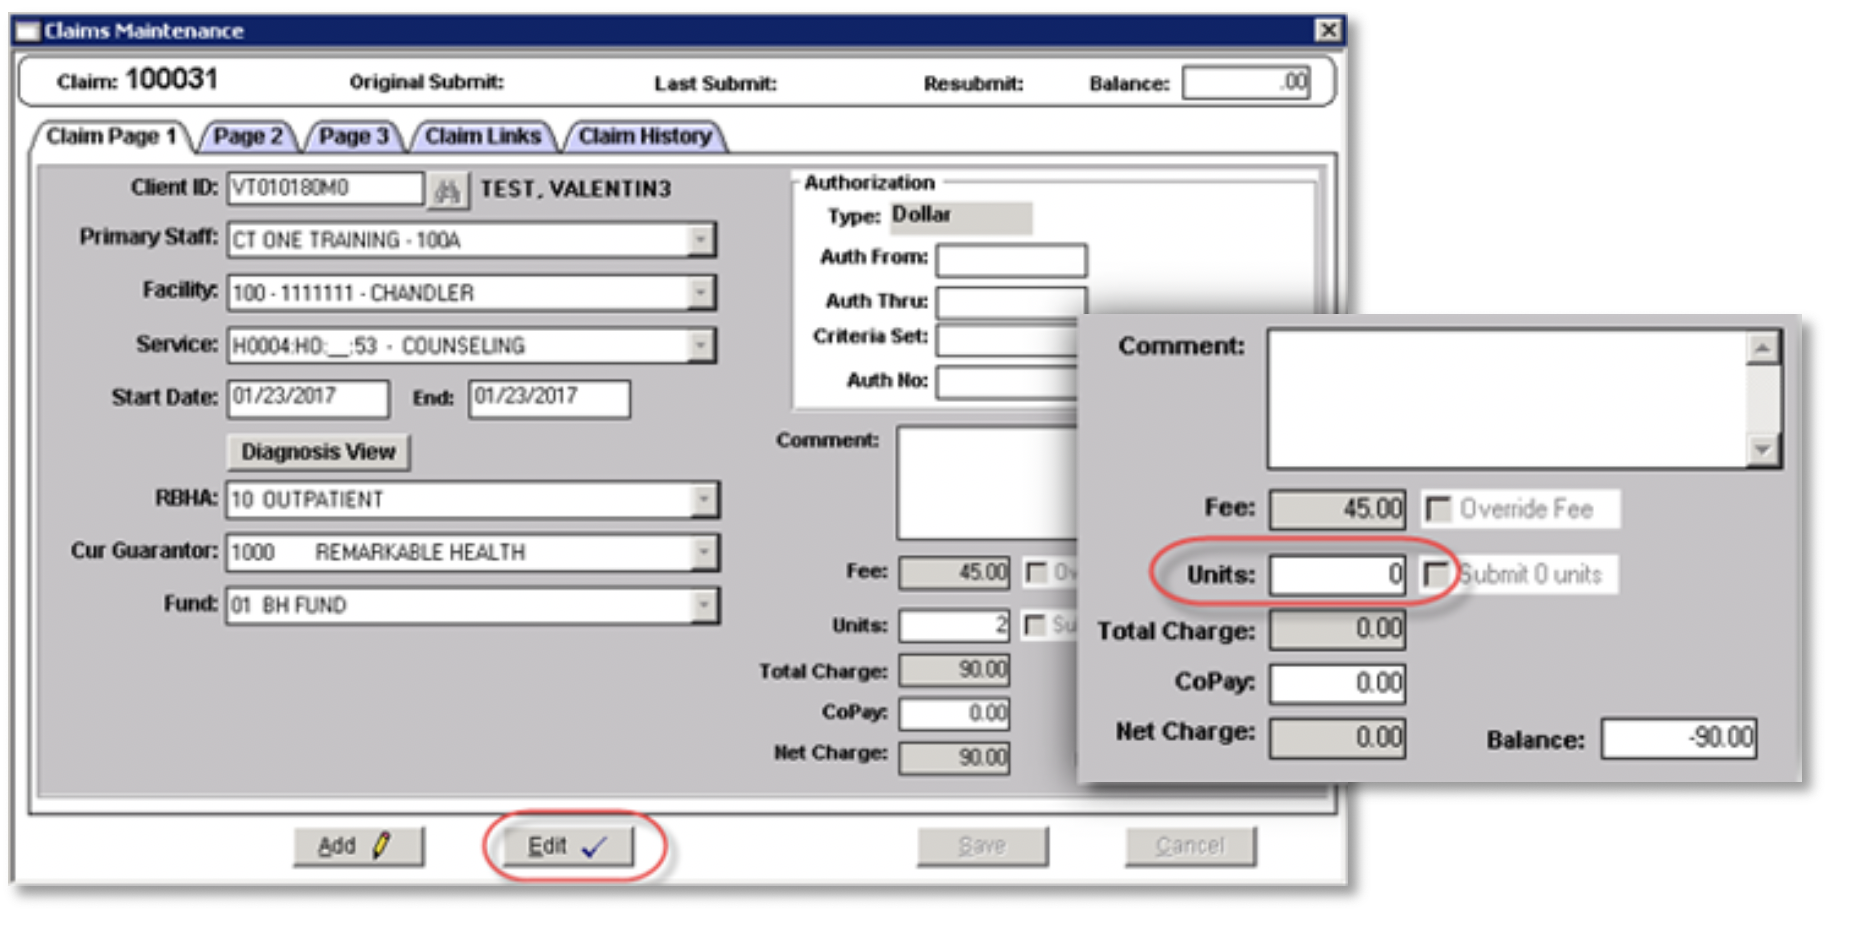
Editing the claim can be completed from the claims Search Advanced. Double click the claim to open it.
Click Edit
Change the Units value to zero, this will change the charge to $0.00
Click Save

Void the Claim
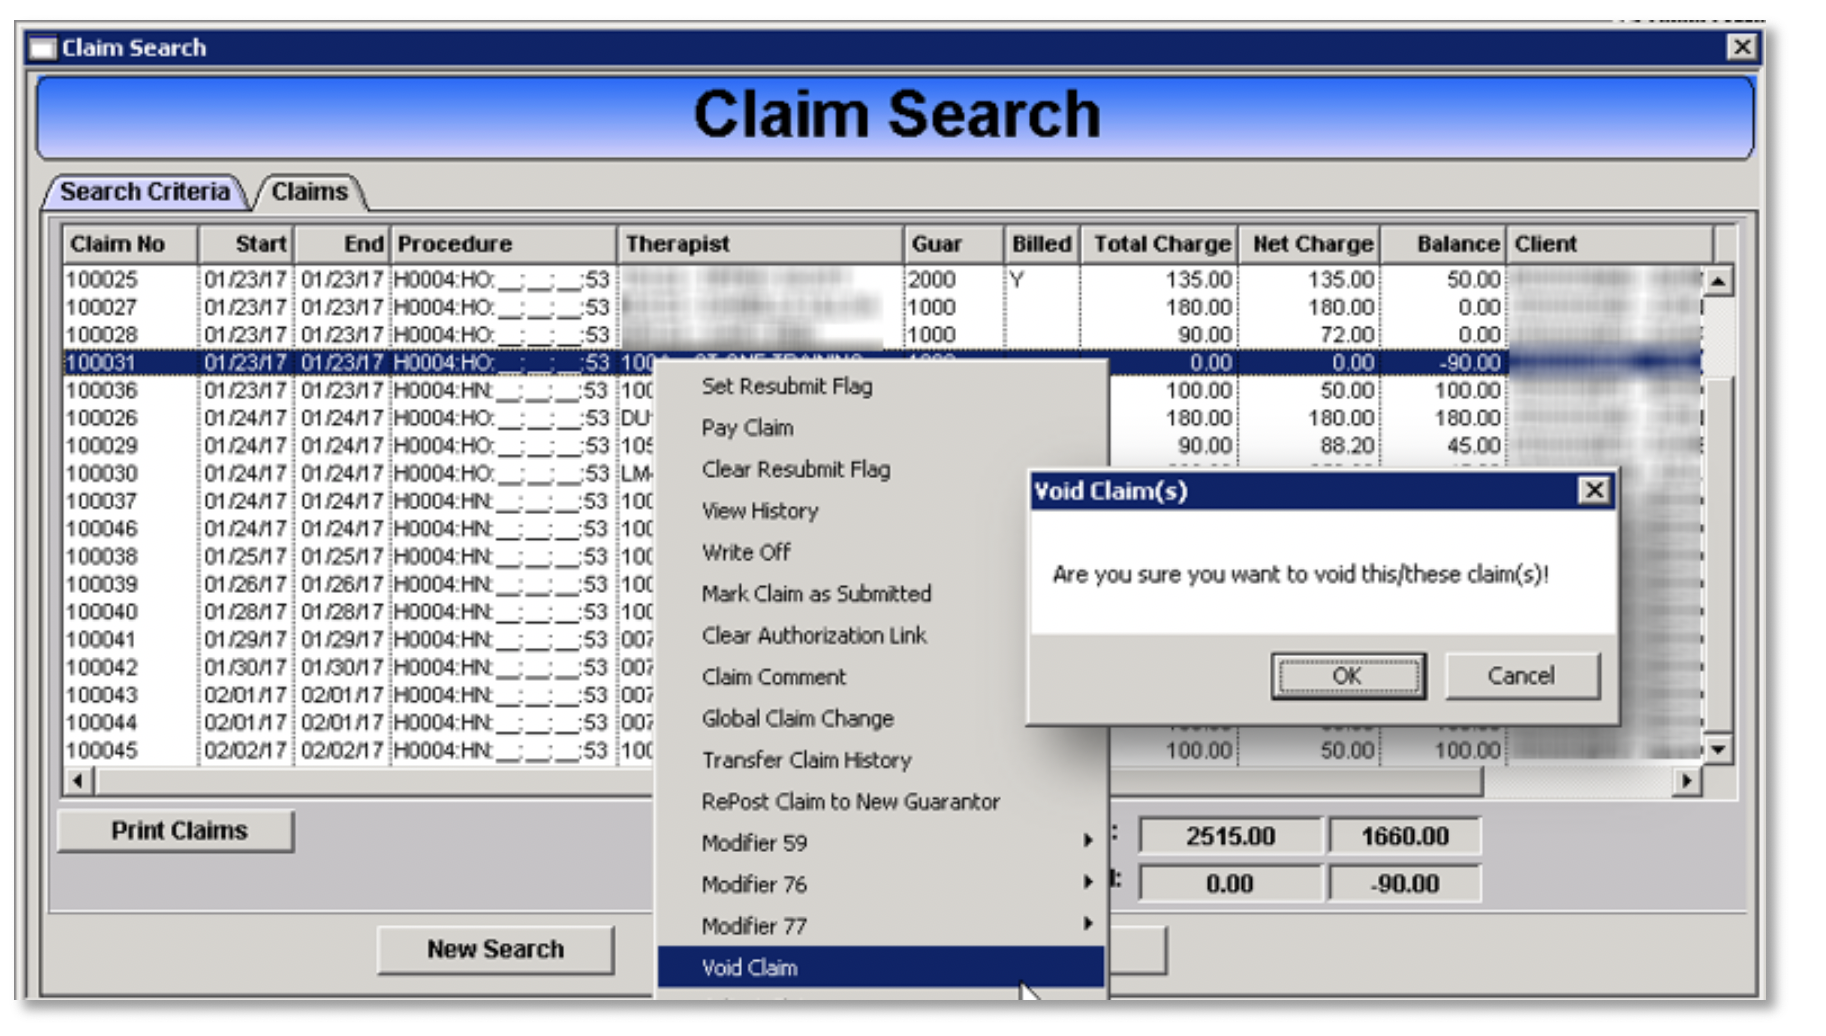
The action of voiding a claim can be completed from the claims Search Advanced.
Right click on the claim
Choose Void Claim from the menu
A warning will present, click OK to continue with the void

Multiple claims can be voided at the same time by holding down the Shift key (for continuous multiple claims) or the Ctrl key (to select random claims) while clicking on the claims to be voided. Then right click on the highlighted area and click Void.
Mark Claim as Submitted
The action of marking a claim as Submitted can be completed from the claims Search Advanced.
The reason of marking the claim as Submitted (Y) it’s to prevent the claim to
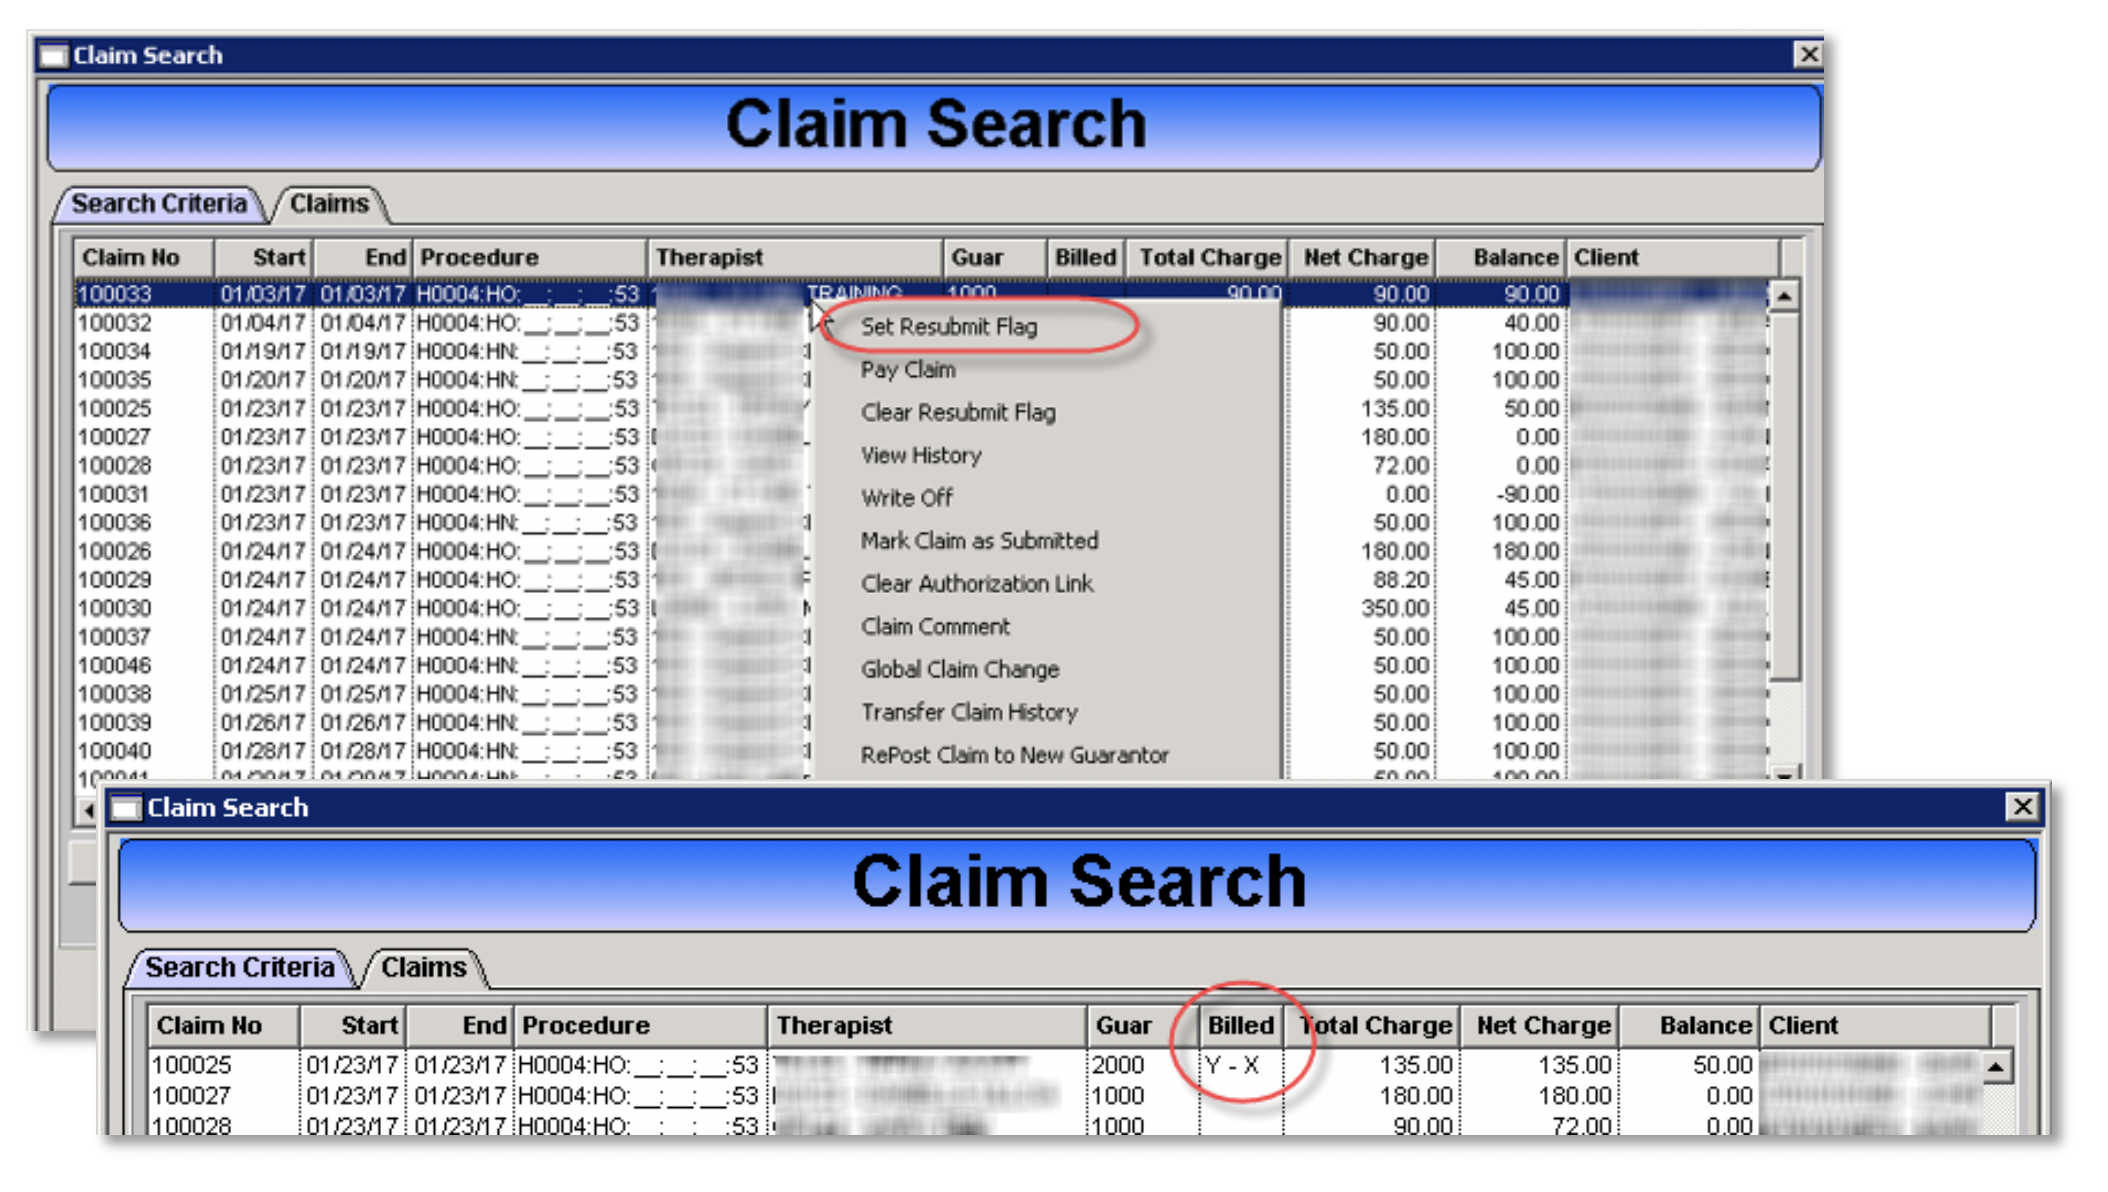
Right click on the claim
Choose Set Resubmit Flag from the menu
A “Y” will be placed in the Billed column, noting the claim is marked as submitted
Multiple claims can be selected at the same time by holding down the Shift key (for continuous multiple claims) or the Ctrl key (to select random claims), while clicking on the claims to be marked for resubmission. Then right click on the highlighted area.
Mark Claim for Resubmission
The action of marking a claim as Resubmitted can be completed from the claims Search Advanced.
Right click on the claim
Choose Set Resubmit Flag from the menu
An “X” will be placed in the Billed column, noting the claim is marked for resubmission
